Choose a formation by its tradeoffs, not its reputation
Turn “which formation is best?” into a more useful question about support, width and the way you play.

Name the problem before the formation
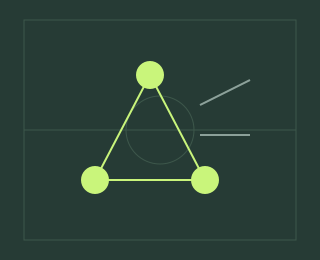
A formation is a starting arrangement, not a guarantee of a certain kind of football. Before choosing one, describe what you want your team to make easier. Do you need a short passing option through midfield, a second forward near the striker, or a wider outlet when the centre is crowded?
Choose one priority. Trying to maximise width, central numbers, immediate pressure and deep cover at the same time hides the tradeoffs. The right starting point is the shape that gives you a clear way to solve the problem you actually notice.
Compare the support around your next pass
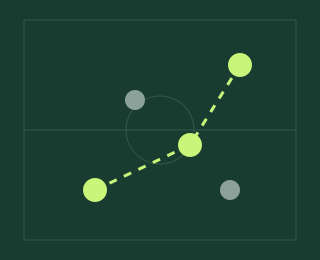
Draw a 4–3–3 and a 4–4–2 on the board. In each one, imagine the ball reaching your first forward. Where is the next safe option? Where is the player threatening beyond? A second striker may offer a nearby partner, while a midfield three may give you another central support route.
These are conceptual observations about the drawing. Actual in-game positioning depends on version, roles, instructions, phase and individual movement. Check your own replays to see whether the intended shape occurs.
Make width a deliberate choice
Wider starting points can open a route around crowded central areas. They also increase some passing distances. A narrower shape can bring short options together while making it easier to crowd the same lane. Neither is automatically better.
Use the width control to explore the idea visually. It is not an EA tactics setting. Watch how the board's outfield width changes, then consider which players would need to move to support a wide receiver. Plan the supporting movement rather than moving the winger alone.
Account for the loss of possession
Any attacking idea should include a recovery plan. If both fullbacks advance, who is available behind the ball? If a midfielder arrives in the box, who protects the central route? Try drawing the instant possession changes instead of only the settled attacking picture.
The deeper-cover count in Touchline is just a count of points in a specified region of the board. It cannot tell you whether those players will intercept a pass. Use it as a reminder to ask where support comes from, not as a tactical score.
Run a comparison you can explain
Save each setup under a descriptive name and state the one difference being tested. Log matches in the same mode and keep the rest of the squad stable where possible. Review chance creation as well as defensive outcomes. A safer shape may lower both goals scored and goals conceded.
After a few sessions, write a sentence explaining when each setup helps you. A useful personal playbook says “I use this when my striker is isolated,” rather than “this is the best formation for everyone.”
| Starting shape | Question in possession | Question after a loss |
|---|---|---|
| 4–3–3 | Can the midfield offer a route inside and an outlet wide? | Who supports the space behind an advancing wide player? |
| 4–4–2 | Can the two forwards connect without losing midfield support? | Can two central midfielders protect the next central pass? |
| 4–2–3–1 | Can a player connect the deeper pair to the forward? | Does that connection recover or leave the pair isolated? |
This table describes starting relationships, not fixed game-engine behaviour. A 4–3–3 with different roles can create very different pictures. Likewise, a pair of holding players does not automatically make a setup safe if you repeatedly drag them out of the middle. Inspect the phase you actually struggle with before changing the shape on the team screen.
Choose an observation that can disprove your idea
Suppose your idea is “a second forward will stop my striker becoming isolated.” In five attacks, note whether the receiver has a nearby partner when the ball arrives. Also note whether you lost a useful midfield outlet. If the forward connection improves but you can no longer move the ball out of defence, the comparison has revealed a cost rather than a complete solution.
Save a short setup card: priority, shape, one role change, expected benefit, likely cost, and what would make you revert. You can use the 3D Arena to examine distances from different angles. Its sliders are Touchline visual controls and must not be copied as numerical EA tactics settings.
For a more structured comparison, use the custom-tactics testing worksheet. A formation you understand and can adapt is more useful than a fashionable diagram whose passing routes you cannot explain.
One idea. Your next match.
Turn the story into a small experiment with Match Lab. Make one change, keep a note, and see what your matches tell you.
Open Match Lab ↗Original Touchline guide. These are review methods and coaching hypotheses, not official EA advice or guaranteed game mechanics. Editorially reviewed 16 October 2026. Editorial standards · Report a correction. Illustrations are conceptual, not match measurements.