Defend the middle before chasing the ball.
A practical midfield positioning guide: protect the dangerous route, recognise the pressing trigger, and review when to step out.
Start with the pass you want to prevent
Following the ball feels active, but it can leave the next receiver free. In central midfield, your position matters because it changes which pass the opponent can attempt next. Before chasing a carrier sideways, identify the most dangerous forward receiver and the route towards your goal. Your immediate job may be to make that route less attractive while another player approaches the ball.
This guide offers a positioning framework for your own review. It does not specify a universal defensive depth, button sequence or role that works in every edition. The camera, player movement, mode and your selected defender all affect what you can reasonably see and control.
Use three reference points
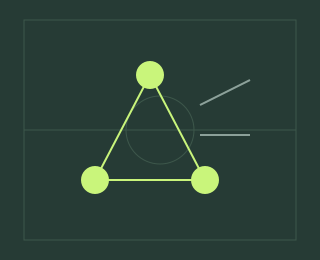
Look at the ball, the central receiver, and your nearest defensive line. Imagine a triangle joining them. A midfielder who moves towards the ball without checking the receiver can open one side of that triangle. A player who sits too deep can also give the opponent time to turn. The useful position balances access to the carrier with protection of the next pass.
Do not confuse protecting a lane with standing still. Move with the situation. When the ball travels towards the touchline, adjust your angle so you can still influence the middle. When an opponent changes direction or a teammate steps out, reassess who is covering the route you are about to leave.
Decide when pressure is worth the space
A heavy touch, a receiver facing away from goal, or a nearby teammate providing cover can make a pressing attempt easier to justify. They are cues to inspect, not automatic commands. If the opponent has already turned and your next defender is occupied, charging out may offer them the exact pass you intended to stop.
Ask a short question before stepping: if this player gets past me, who handles the next receiver? If you cannot identify cover, delaying while recovering towards the central route may be a better test. Delaying still has a cost: the carrier can gain territory or switch play. Review that tradeoff rather than labelling all passive defending as disciplined.
Work through an imagined attack
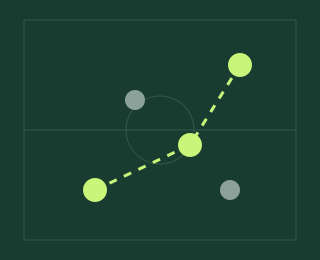
The opponent's right-sided attacker carries inside while a forward moves between your centre-backs. Your selected central midfielder can chase the carrier or stay between the carrier and the forward. A fullback is recovering from the side. In this drawing, the midfielder can try to protect the central pass while the fullback approaches. If the fullback is too far away, the carrier may still progress and the decision needs to change.
Now change one detail: the forward moves away and the carrier takes a loose touch towards your midfielder. The original reason to hold the lane is weaker. The point is to read the relationship, not to adopt a permanent “never press” rule.
A five-attack positioning drill
- Choose five settled opponent attacks from one session, including attacks you stopped.
- Pause before your selected midfielder leaves a central position.
- Name the forward receiver and the covering teammate, if either is visible.
- Record what happened to the central route after you moved.
- Choose one cue for the next session, such as checking the receiver before chasing sideways.
Mark off-camera information as unknown. Do not infer a player's exact role from one movement, and do not use a successful tackle as proof that the decision was always safe.
| Question | Useful observation | Possible next test |
|---|---|---|
| Why did I step? | Carrier was facing away; cover was nearby | Repeat the cue and check the next pass |
| What opened? | Forward received in the space I left | Protect the central route for one session |
| What did holding cost? | Opponent advanced wide without pressure | Coordinate cover before delaying again |
Connect the practice to the rest of the team
If your midfield always arrives too late, the problem may begin with a turnover or a large gap in the setup. Compare this guide with reviewing counterattacks. Use the tactical board to draw the gap, then test one change in-game. Track your cue alongside results; a single clean sheet cannot establish that your positioning improved.
Keep a setup when you can explain both the route it protects and the pressure it gives up. That explanation is what lets you adjust against a different opponent.
One idea. Your next match.
Turn the story into a small experiment with Match Lab. Make one change, keep a note, and see what your matches tell you.
Open Match Lab ↗Original Touchline guide. These are review methods and coaching hypotheses, not official EA advice or guaranteed game mechanics. Editorially reviewed 16 October 2026. Editorial standards · Report a correction. Illustrations are conceptual, not match measurements.