How to review counterattacks in EA FC
Find the first decision that exposes your defence, then test one change without rebuilding your whole team.
Start five seconds before the chance
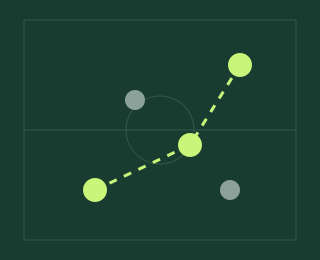
The final through ball is the easy moment to blame. The useful question is what made that pass possible. Open a replay and pause before your team lost possession. Look at the ball carrier, the nearest support player and the space between midfield and defence. Do not judge the entire tactic from one goal.
Collect three examples before making a major change. A single chance may follow an unusual bounce or an individual error. Repeated losses in the same zone give you a clearer starting hypothesis. Write down the location and the decision you controlled.
Separate the turnover from the recovery
There are two different problems to test. First, did you give the ball away while your teammates were committed forward? Second, after the loss, did your selected player close the dangerous lane or leave it? A safer pass addresses the first problem. More disciplined recovery positioning addresses the second.
In your notebook, label each example as a risky turnover, a recovery decision, or unclear. Avoid inventing certainty when the clip does not show the full picture. If the same category appears repeatedly, make it the focus of your next session.
Choose one small adjustment
One useful hypothesis is to keep a central passing option behind the ball. Another is to delay the next pass with a midfielder before moving a centre-back out of the defensive line. These are coaching ideas to test, not confirmed instructions that every game version executes identically.
On the Touchline board, draw the moment of possession loss. Place the supporting midfielder and fullbacks where you expect them to be. Check the distance to the next defensive line. The board illustrates your idea; it cannot predict the game's actual player movement.
Measure the tradeoff
A deeper support player may reduce the number of attackers arriving in the box. Log both goals conceded and goals scored. If the attack becomes too isolated, you may have exchanged one problem for another. Keep a note of whether your first forward pass still has a useful receiver.
Record several baseline matches, then several test matches in the same game mode and game version. Keep the rest of your setup stable. Opponent strength and connection conditions can still change the outcome, so use the numbers alongside replay observations.
Your next-session checklist
- Review three dangerous transitions and label the first controllable decision.
- Choose either turnover prevention or recovery positioning as the variable.
- Save a named tactical setup and state what you changed.
- Log baseline and test matches with the same definitions.
- Keep the change only if both the footage and the pattern of results support it.
A worked example: the fullback turnover
Imagine your right fullback receives near halfway. The winger is already ahead of the ball, your nearest midfielder is moving towards the box, and the opponent intercepts a pass inside. Your centre-back then runs towards the new ball carrier, leaving the central forward unmarked. This example has two separate decisions: the unsupported pass and the attempt to recover by abandoning the line.
For the first test, leave the defensive setup alone. Before playing that inside pass, look for a supporting player behind or level with the ball. If no support exists, recycling possession is one available choice. For a later test, review whether a midfielder can delay the carrier while the centre-back retains the central position. Do not change both behaviours at once and then guess which helped.
| Clip | First controllable decision | One test |
|---|---|---|
| 1: right side | Inside pass with no close support | Check the return route before passing |
| 2: central loss | Centre-back leaves the forward | Delay with a recovering midfielder |
| 3: unclear | Ball leaves the visible camera area | Keep the uncertainty; collect another clip |
Define a dangerous transition consistently: for example, possession lost followed by an opponent reaching your penalty area before you regain a settled shape. That is your review definition, not an official statistic. Count the opportunities for that event as well as the events themselves. Two dangerous breaks from three losses tells a different story from two breaks after twenty losses.
If you need a wider explanation of the central recovery position, continue with defending the middle before chasing the ball. Keep your notebook brief enough that you can use it after an ordinary evening, rather than only after a particularly frustrating defeat.
One idea. Your next match.
Turn the story into a small experiment with Match Lab. Make one change, keep a note, and see what your matches tell you.
Open Match Lab ↗Original Touchline guide. These are review methods and coaching hypotheses, not official EA advice or guaranteed game mechanics. Editorially reviewed 16 October 2026. Editorial standards · Report a correction. Illustrations are conceptual, not match measurements.