A calmer way to review playing out of a press
Spot the missing support option, review the first touch, and make a practical plan for pressure.
Pressure is a decision problem
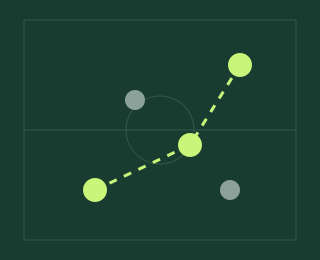
When every forward pass looks blocked, it is tempting to force a longer pass or sprint away from the nearest defender. Sometimes that works. When it repeatedly fails, review the situation before the ball arrives. Was your receiver facing a usable exit? Was a short return pass available? Was the next player already covered?
Take three examples from a session. Choose losses near your own goal or around midfield rather than every misplaced attacking pass. Those situations have different risks and should not be mixed into one diagnosis.
Look for an exit before the first touch
Pause the clip just before the receiver touches the ball. Identify one forward route, one lateral route and one return route. You may not have all three. That absence is useful information: an isolated player may need a teammate closer, rather than a more complicated input.
The purpose of this exercise is to recognise options earlier. It is not a rule that you must pass backward. When a forward lane is open, take the opportunity. The return pass is an escape option when the defender commits, not the end of every attack.
Test the sprint habit separately
If you often sprint in crowded areas, use a short session to observe what happens when you release sprint before receiving under pressure. Keep the formation and squad stable. Count dangerous turnovers using the same definition in every match. Compare clips as well as the final result.
This is a behavioural experiment, not a claim about a hidden control mechanic. Your timing, available space, card attributes and the opponent's movement all matter. You are testing whether the habit helps your own decisions.
Use the pitch as a planning aid
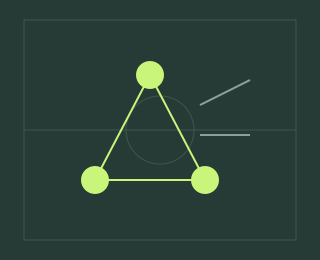
Draw your ball-side triangle on the tactics board: the receiver, a supporting midfielder and a safe return option. If all three sit on one straight line, imagine which pass the opponent can block with one player. Move one support point and discuss what that change opens and what space it leaves elsewhere.
Do not mistake a neat drawing for a working tactic. The board does not model AI behaviour or player roles. Try the idea in-game, save a representative clip, and check whether your intended support actually appears.
Review one question after the session
Ask whether the ball carrier had a usable next action more often. A higher possession percentage alone does not answer that. You could keep the ball while creating fewer chances, or attack more effectively with less possession. Record the decision pattern you wanted to change and judge that pattern first.
If the experiment helped, retain it for another session before adding a second change. If it did not, look again at the evidence instead of assuming you need an entirely new formation.
Work through one touchline trap
Consider a centre-back passing to a fullback close to the line. The opponent presses from the inside, a winger blocks the pass up the line, and your midfielder stays beyond the nearest defender. The fullback is receiving into a trap even if the pass itself is accurate. A useful question is whether you saw the isolation before committing to the pass.
Draw the return option first, then a support point on a different angle. Your aim is to create choices the same opponent cannot cover with one movement. The third player need not receive the very next pass; sometimes their position makes the first return route available. These are geometric ideas, not a promise that a particular role setting will produce the diagram.
A short receiving practice
- During a low-pressure practice session, name the safe return option before passing towards the touchline.
- On reception, look at the defender's approach before deciding to turn or return the ball.
- Review five receptions. Record whether you identified an exit early, including the successful ones.
- If support remains absent, change one support position and repeat the observation.
A clearance or a direct pass can still be the sensible response when the alternatives expose your goal. Keeping possession is useful only when the choice serves the match situation. Do not turn this practice into a requirement to play a short pass regardless of risk.
Use the tactical board to save the triangle you intended, and a second drawing for what appeared in the replay. The difference between them is often a more useful next question than the total number of passes you completed.
One idea. Your next match.
Turn the story into a small experiment with Match Lab. Make one change, keep a note, and see what your matches tell you.
Open Match Lab ↗Original Touchline guide. These are review methods and coaching hypotheses, not official EA advice or guaranteed game mechanics. Editorially reviewed 16 October 2026. Editorial standards · Report a correction. Illustrations are conceptual, not match measurements.